Showing posts with label recipe. Show all posts

August 7, 2010

RECIPE: BLUEBERRY BANANA MUFFINS

I'm not really a fan of muffins. Their nutritional stats aren't that great and when compared with a cupcake, who wouldn't want a sugary treat topped with icing instead? Actually, I'm not a craver of sweets either but whatevs. Anyway, with a bunch of blueberries and bananas in the kitchen to use up, I got to what I do best: baking! Of course, this recipe was done almost three full weeks ago but whatevs (yet again).

The recipe is quick and easy if you have all the necessary items (if you're a healthy eater you'll probably have them all on-hand). I pulled these together in no-time. The hardest part was waiting for them to bake!

The recipe calls for buttermilk but I didn't have any (I never use buttermilk in recipes) so I subbed milk and vinegar) but then read the buttermilk alternative wrong so I poured that out and started again with milk and lemon juice but then I ran out of milk and used plain yogurt instead. The result was a super moist muffin with a little bit of texture from the cornmeal and plenty of taste from the blueberries and raspberries (frozen from the raspberry picking trip on Canada Day at Whittamore's).

Here are my muffins ready for the oven:And after 28 minutes in the oven, here are the raspberry ones:and the blueberry ones:
Aren't they delicious?
I opted not to top them with sugar as I would have liked since I wanted to share these with my dad who is watching his sugar intake. He's not full-blown diabetic but his life-long passion of seriously indulging his sweet tooth made him borderline diabetic, words from his doctor last fall. Since then, he's seriously curbed his sweet tooth, no longer indulging in any form of sweets (no sugar in his tea/coffee) and anything sweet he now thinks is sugar-overkill. It's kind of a hassle to bake for him but these muffins were a perfect treat. The tablespoon of honey and ripe bananas provided just the right amount of sweetness. They were also great as a breakfast treat, which I ended up enjoying them as for days to follow. They didn't keep in the fridge for very long so sharing is a must--even if you don't want to.
Berry-Banana Muffins
(adapted from Whole Living.com)

Ingredients:
- vegetable-oil cooking spray
- 1/2 cup yellow cornmeal, preferably stone ground
- 1 tsp baking powder
- 1/2 tsp baking soda
- 1 cup + 2 tsp AP flour, feel free to use whole wheat
- 1 1/2 cups ripe bananas, mashed (approx. 3 large bananas)
- 1/4 cup yogurt + 1/4 milk and 2 Tbsp lemon juice)
- 1 Tbsp honey
- 1 Tbsp lemon juice
- 1 large egg
- 1 tsp vanilla extract
- 1 1/2 tsp sanding or turbinado sugar

Directions:
  1. Preheat oven to 375 degrees. Line a standard (12-cup) muffin tin with paper liners; coat liners with cooking spray.
  2. Whisk together cornmeal, baking powder, baking soda, salt, and 1 cup flour. In a large bowl, stir together bananas, buttermilk, rice syrup or honey, lemon juice, egg, and vanilla. Fold cornmeal mixture into banana mixture just until combined. Toss blueberries with remaining 2 teaspoons flour, and gently fold into batter.
  3. Spoon batter into prepared tin, filling to the brims. Sprinkle each muffin with sugar (optional). Bake until a toothpick inserted into center of 1 comes out clean, about 30 minutes. Let cool completely in pan on a wire rack. (Muffins can be stored in an airtight container at room temperature for up to 3 days.)

July 15, 2010

RECIPE: AVOCADO-CUCUMBER SOUP

Summertime is a time for soups. No, really it is. Chilled soups are a great option for summer but a) who the hell wants to cook when you can just chop and blend and b) they're the perfect light meal for any hot, sticky evening.

This evening in particular, I had all the ingredients (well, most of them), necessary to make Martha Stewart's Avocado-Cucumber Soup. Of course, since Martha's soup included shrimp (to which I am allergic), I made a few adaptations, but look at the outcome:
I think it was well worth it, don't you?

Dom's Avocado Cucumber Soup (serves 2)
Recipe adapted from Martha Stewart
Ingredients:
- 3/4 of an English cucumber
- 1 ripe avocado, pitted and coarsely chopped
- 2 1/2 Tbsp lime juice (this is a lot but I REALLY like lime)
- 1/4 cup plain yogurt
- 1 green onion, coarsely chopped
- 1 cup ice water
- 1/4 tsp - salt
- pepper, to taste
- 2 Tbsp - corn kernels (optional, for garnish)

Directions:
  1. Divide the cucumber in thirds and coarsely chop two-thirds. Finely dice the remaining third and set aside.
  2. Combine coarsely chopped cucumber, avocado, yogurt, lime juice, green onion, ice water, salt and pepper in your blender or food processor of choice. (Note: I chose the Magic Bullet. It's also the only blender/food processor I have.)
  3. Taste. Season some more if necessary.
  4. To serve: Ladle soup into two separate bowls. Sprinkle corn kernels and reserved diced cucumber on top. Drizzle with extra virgin olive oil, if desired and crack over some fresh pepper.
Now go make it and enjoy!

July 10, 2010

BLUEBERRY-BANANA YOGURT POPS!

Hot, humid days call for cold treats but because I try to refrain from as much artificial fructose-glucose as possible (ie: anything not in fresh fruit form), I can't consume copious amounts of popsicles and freezies as I used to.

Confession time: I did consume 1/2 a No Name freeze pop with Sean when he picked me up from work on Thursday as we had some in our work freezer. I also consumed a whole one on Friday after work because my dad didn't want to split one with me. I figured that splitting a whole one wouldn't result in a fructose-glucose migraine attack and I was right. So far-so good with the whole freeze pop consumption but the day is still young.

In an effort to make healthy, all-natural popsicles, here's my recipe for blueberry-banana yogurt pops, which are high fructose corn syrup-free, yay!

BLUEBERRY-BANANA YOGURT POPSICLES
Ingredients:
- 2 ripe bananas
- 1/2 cup blueberries (I prefer firm blueberries)
- 3/4 cup of yogurt
- juice of 1/4 of a lemon
- maple syrup (optional, if your bananas are not ripe)

Directions:
  1. Blend bananas in Magic Bullet (or your blender/food processor/Vita Mix).
  2. Add the rest of the ingredients.
  3. Pour into 8 ice-pop molds, pop on the lids and carefully transfer to freezer.
  4. Wait. At least 8 hours. Ugh! It's best to leave the house if your house is not air-conditioned like mine, because it's unwise to open the freezer to cool yourself off as the popsicles would take even longer to freeze.
Okay so yeah, that isn't really a recipe per se but there are ingredients and proper measurements, which is a more than I can say for most of the food I post on here. Honestly, this popsicle recipe is dead simple. I took a small taste of my yogurt mixture before pouring into the popsicle molds and cannot wait for them to set. Mmmm...fruity, yogurty goodness.

I'll report back with the results.

===

I'm back as promised. A little bit late, I'll admit...but I've been busy; I've watched the FIFA World Cup, gone to Caplansky's again, seen Despicable Me, cooled down at Sean's air-conditioned house and more.

Here are the finished results of the frozen yogurt pops:As you can see (or maybe not), a non-air-conditioned house on a hot day means that your frozen pop will melt pretty darn quickly. You're going to have to eat this fast. Pretty fast. It's okay though because there will be 7 more waiting for you in the freezer. Yum.

June 27, 2010

RECIPE: TRIPLE VANILLA CUPCAKES

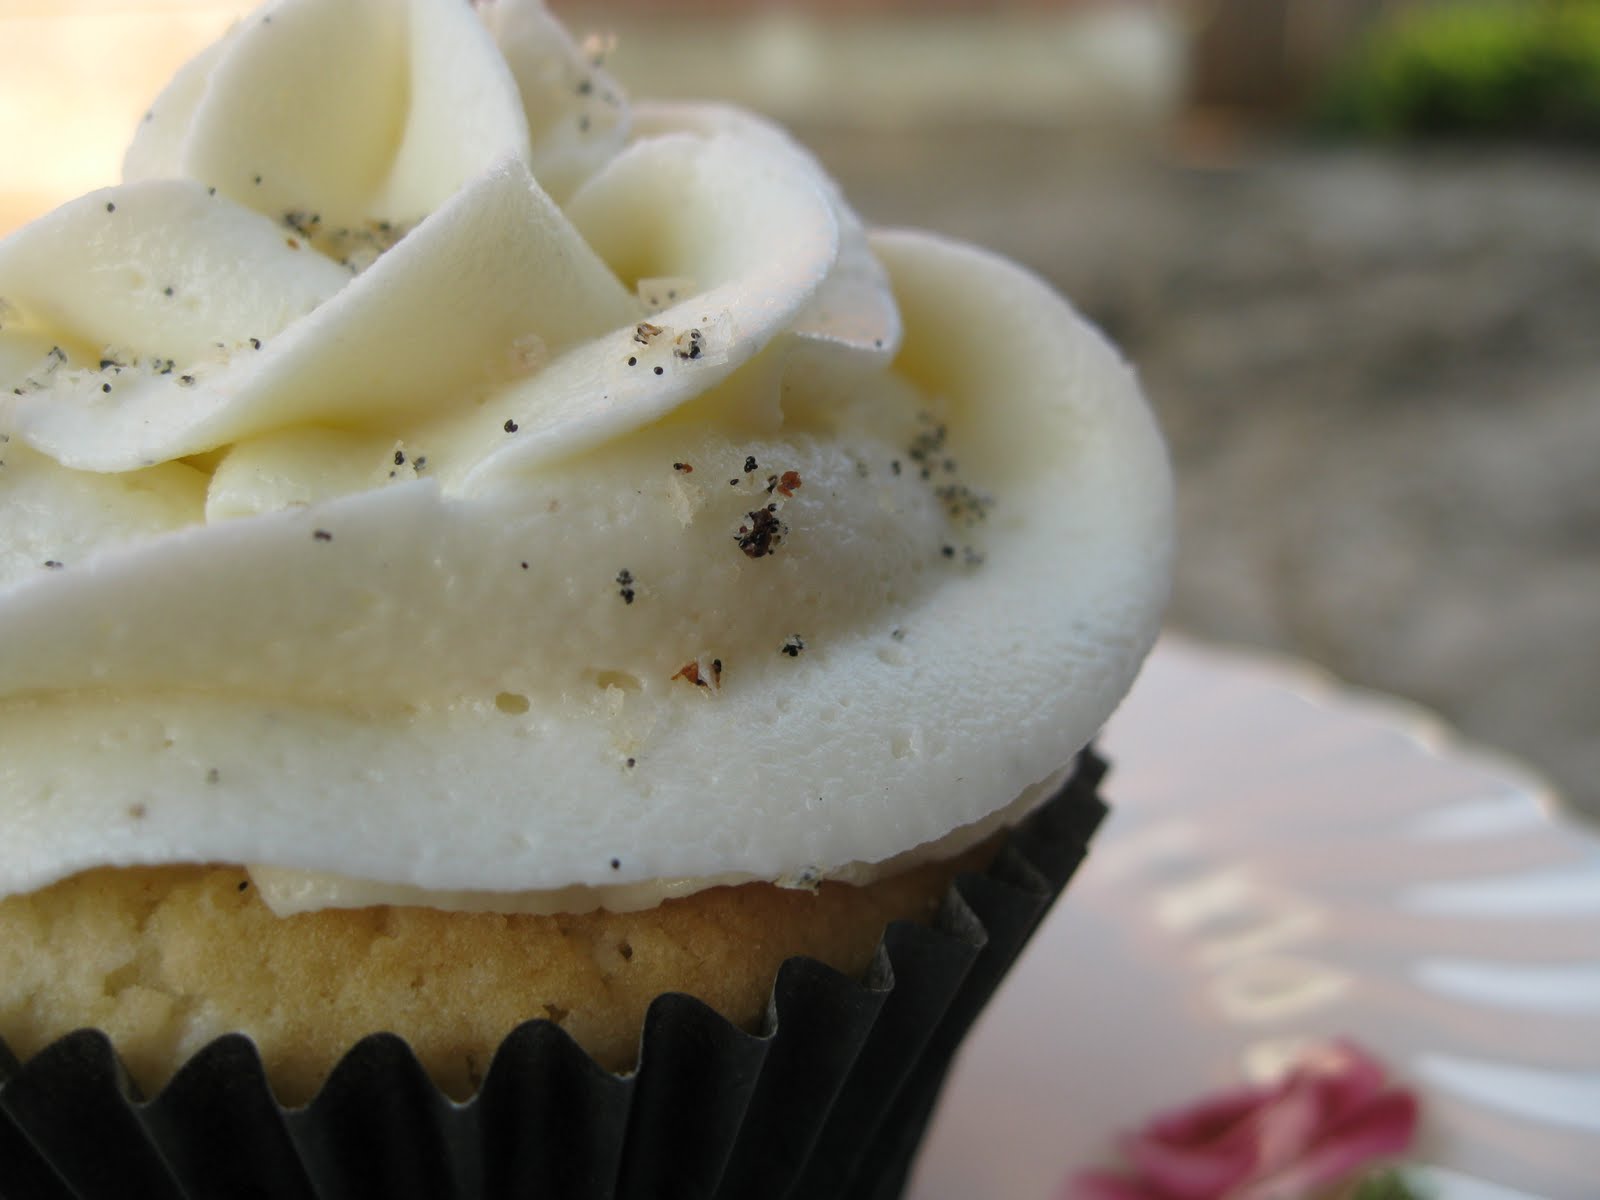
Go ahead, take a bite:Or do you want to take a bite out of this one:Vanilla bean, vanilla extract and vanilla sugar. All three types of vanilla are the stars of the triple vanilla cupcakes. If you don't have vanilla sugar available at your local store, or you want to save some cash and make your own, just use the bean shell/pod from an already-scraped vanilla bean and stick it in a 2L jar with white sugar. Leave it alone for at least a week, shaking the jar every couple of days. After that, open your jar and sniff. You'll inhale the wonderful scent of vanilla sugar. Ta-da, vanilla sugar!

I made these cupcakes at Jessie's house with her and Sean. It was a very hilarious evening involving the KitchenAid stand mixer, a Dollarama spatula and batter going everywhere but those photos aren't as lovely as the ones pictured here.

Triple Vanilla Cupcakes
(adapted from Cupcake Bakeshop*
)

Ingredients:
- 3/4 cup (1-1/2 stick) unsalted butter, room temperature
- 1 cup of vanilla sugar (down from 1 2/3 cups)
- 2 large eggs, room temperature
- 2 2/3 cups flour
- 1.5 tsp baking powder
- 1/4 tsp salt
- 3/4 cup + 2 Tbsp milk
- 1 Tbsp vanilla extract (upped from 1 tsp)
- 1 vanilla bean, seeds scraped out (upped from 1/2 vanilla bean)

Directions:

  1. Beat butter until softened. Add sugar and beat until light and fluffy, about 3 minutes.
  2. Add eggs, one at a time, beating until well combined.
  3. Measure the flour, baking powder, and salt into a medium bowl and whisk to combine.
  4. Measure out the milk and vanilla and stir to combine.
  5. Add about a third of the dry ingredients to the butter/sugar and beat to combine. Add about a half of the milk/vanilla and beat to combine. Continue adding, alternating between dry and wet and finishing with the dry.
  6. Scoop batter into cupcake cups about 2/3’s full. Turn oven down to 350 degrees and bake cupcakes for about 22-25 minutes or until a cake tester comes out clean.

Vanilla Bean Frosting
(adapted from Cupcake Bakeshop)

Ingredients:
- 1 cup unsalted butter, room temperature
- 1 package (8 ounces) philly cream cheese
- 2 Tbsp vanilla extract
- 1/2 vanilla bean, seeds scraped out
- 4-5 cups powdered sugar*

Directions:

  1. Using an electric mixer, beat the butter at medium speed until creamy.
  2. Add the cream cheese and beat until combined.
  3. Add the vanilla extract, vanilla seeds, and 3 cups of powdered sugar and beat at low speed, occasionally stopping to scrape the sides and bottom of the bowl, until light and fluffy.
  4. Add more powdered sugar to arrive at the consistency and sweetness you like. (Our frosting was really "runny" so I kept adding more and more powdered sugar. In fact, I nearly ran out and Jessie was worrying about all the sugar I was adding. Next time, I would decrease the amount of butter used to maybe 1/4 of a cup or none at all.)
The next time I decided to sprinkle some homemade vanilla salt (vanilla bean seeds and sea salt) on top of the icing. It was a match made in heaven. If you're a fiend of the sweet and savory combo like I am (think maple syrup on your bacon or Vosges bacon chocolate bar), you'll love this combo. *Jessie and I are pretty much Vanilla Monsters so we upped the vanilla any time we could. She also suggested we cut down the amount of sugar anytime we could and also wanted to reduce the amount of butter (she's currently on WW) but while I was okay with decreasing the amount of sugar, I wasn't keen on the butter reduction. Cupcakes are my one indulgence and I don't indulge in cake (in any form) very often anyway.

May 24, 2010

ILLEGALLY HOT

This is a kind of hot I am NOT down with. I don't care what anyone else in town thinks or says about me but I hate the heat. Ironically, with the passion of a thousand fiery suns. It was 28.5C earlier today but felt more like 32 or something like that with the humidity. Tomorrow is going to be 29C but feel like 35C with the humidity--not cool! It makes me angry. It makes my angry. I get heat rashes, my face gets red, my whole body feels like it's burning up, my head starts to hurt and I get grumpy. I get really, really, really grumpy.

I've spent much of the afternoon doing nothing but sitting infront of my laptop streaming past episodes of Top Chef Masters and sipping on water with lemon, lime and cucumber slices. I'm trying to move as little as possible. It doesn't help that my windows are curtain-less, a result of my parents getting our windows redone a few YEARS ago. Yep, you read that right...we had our windows redone years ago but I am still curtain-less.

I still managed to bake earlier this afternoon as I had planned but stuck to one recipe instead of two. Hey, you're lucky I baked at all, what with the oven having to be turned on and having to actually mix things in a bowl instead of using my trusted KitchenAid stand mixer. I followed The Single Dish's for Raspberry Cinnamon muffins but used all-purpose flour (we're out of whole wheat flour and today is a holiday so no non-Asian stores are open) and organic strawberry jam (because that's what I picked up from Walmart). So in essence I followed the original recipe that she followed from MyRecipes.com.

Strawberry Cinnamon Muffins
from MyRecipes.com via The Single Dish

Ingredients:
- 1 1/2 cups all-purpose flour
- 1/2 cup sugar
- 2 1/2 tsps baking powder
- 1 tsp ground cinnamon
- 1/4 tsp salt
- 2/3 cup vanilla fat-free yogurt (I used organic plain yogurt, although adding 1/4 tsp of vanilla would have been a good idea)
- 1/4 cup butter, melted (I melted my butter and let it cool a little bit)
- 3 tbsp 1% low-fat milk
- 1 large egg, lightly beaten (I didn't beat my egg)
- Cooking spray (I have a can of Pam I have to use up otherwise I'm not a fan of cooking spray)
- 1/4 cup strawberry jam
- Muffin topping: mixture of 1 tbsp of sugar + 1/2 tsp cinnamon

Rough directions (aka "my directions, not from MyRecipes.com")
  1. Preheat oven to 375F.
  2. Prepare muffin tins. You have two options (cue memories of Choose Your Own Adventure books): Option #1: spray muffin tin with cooking spray. Option #2: Line muffin tin with muffin liners and spray those with cooking spray. I just went ahead with Option #3 (fooled ya, didn't I?): spray 6 muffin tins with cooking spray and line the remaining 6 with muffin liners and spray those with cooking spray too. (I actually did this because I wanted to see which method I preferred better, plus I'm getting a little tired of all those used muffin liners. They're actually quite a waste of money.)
  3. Mix first five ingredients (flour, sugar, baking powder, cinnamon and salt) together. I usually use a whisk but have been known to use a fork if the whisk is already dirty from other cooking/baking. It works just as well in my opinion.
  4. Make a "well" in the center and add the next four ingredients (butter, milk, egg and yogurt). Fold wet and dry ingredients together with a spatula. Do NOT overmix!
  5. Fill muffin tin (or muffin liners) halfway with batter. Divide the 1/4 cup of jam between the 12 muffin tins, placing a small spoonful in the center of the batter. I did this to keep things neat and tidy.
  6. Sprinkle muffin topping evenly over each muffin and then bake for 15 minutes.
When your muffins are done and you've let them cooled--perhaps you've gone out for 90 minutes to get your nails done and pick up groceries at the Asian market (two of the only things you can do on a public holiday)--your muffins will look like this:
I dived into one as soon as I could and it was amazing. Considering it only contained 1/4 of butter, it tasted really rich but still light and airy. The strawberry jam center wasn't too overpowering either. I used organic strawberry jam with no additives so it wasn't as strong or sugary-sweet as one of those regular brands would have been but I liked it that way. Plus the slightly crunchy top from the sugar and cinnamon was a great addition. Sean loved it too. I told him about the organic jam situation but he said he liked it. He actually said it was one of his favourite things that I have baked. Yippee! To make the top even crunchier, next time I would use turbinado sugar with the cinnamon. Mmm...I can't wait until the next batch I make! Ooh and maybe using some wildberry jam instead...mmm.

Rewinding back the day a little bit...lunch consisted of fried vermicelli noodles with pork and some various veggies including green onions (or scallions, if you prefer) and that's pretty much all I can remember. Whoops. The old mind ain't what she used to be!

April 25, 2010

RECIPE: YUCCA FRIES

Have you ever spent $6 on a serving of yucca fries only to be greeted by 6-8 fries? Or how about $4, only to be greeted by the same amount of fries? This was my dilemma at the Toronto Zoo and most recently at Arepa Cafe in Toronto. After realizing how much I was paying per fry and thinking in my head that "hey, I'm a decent cook, I could figure out how to make these," I decided to do just that.

I've decided to share my secret on how to make yucca (also known as cassava) fries for less than $1 a fry. So go forth, make your own and start noticing how heavy your pockets will be from all the money you'll be saving.

Ingredients:
- a decent-sized yucca (they have a waxy skin; look for one that doesn't have any blemishes and where the wax hasn't started to crack or peel)
- oil for deep-frying (I used the last of the canola oil to finish it off; vegetable oil would be better)
- sea salt, to season
- paprika (optional)

Directions:
  1. Peel your yucca with a knife:
  2. Cut into fry-like pieces, removing any fibers that should appear. Also cut away any brown bits (tough fibrous parts):
  3. Your fries should look like this when you're done:
  4. Boil the fries for about 8 minutes. Basically you want to be able to pierce the fries with a fork but still be firm. The following were a little bit too tender. I boiled them for 10 minutes. Drain in a colander when done:
  5. Dry your boiled fries on a paper towel, making sure to absorb any excess water. This prevents any oil splatter when you deep-fry them:
  6. Fill a pot with 1" of your chosen oil and commence deep-frying:
Let fries deep-fry for about 5 minutes. Remove from oil and place on paper-towel lined plate to absorb excess oil. Season with salt (and paprika, if using) and enjoy:These were ridiculously delicious and so cheap to make! I couldn't believe I had a whole buttload of yucca fries for a fraction of the cost of the ones at the Toronto Zoo and the restaurant. I think the yucca was only 89 cents per pound so really, my total must have only been a couple dollars for a whole plate load of yucca fries. They were also really easy and didn't require that much effort. I was making four dozen cupcakes while doing this.

I enjoyed these as is, with sea salt, but you can season them any way you like, with paprika, cayenne, dill or with a garlic mayo, spicy guacamole or even some organic ketchup--the possibilities are endless!

April 14, 2010

DINNER THAT ROCKED MY WORLD!

I know I'm so behind in posting. I can't even tell you how far behind I am. I'm not even going to bother using this post to catch up because I have this totally awesome dinner to blog about first--tonight's dinner in fact! Check it out:Totes awesome, right? Well here's how you can make your own.

DOM'S DINNER THAT WILL ROCK YOUR FACE OFF! (And your socks too!) Ingredients:
- two organic chicken legs
- one medium sweet potato, cut into small chunks
- four small potatoes, cut into quarters
- head of one small broccoli, trimmed and cut into florets
- one portobello mushroom, sliced into four
- leftover quinoa (I used four cooked spoonfuls)
- copious amount of garlic salt
- copious amount of extra virgin olive oil
- lemon juice
- salt and pepper

Directions
  1. Prep chicken by rinsing and then patting dry. Cut each leg in half, separating the drumstick from the thigh. Drizzle with oil and garlic salt. Place in a 9x13" baking dish lined with tin foil and sprinkle with more garlic salt. Yes, I'm sure. Now set the dish aside.
  2. Toss both potatoes with olive oil and garlic salt and place in baking dish, try and get everything in one layer. Set baking dish aside--again.
  3. Toss broccoli and mushrooms with olive oil and garlic salt. Set aside.*
  4. Place baking pan in 375F oven for 25 minutes. After time is up, add the broccoli and mushrooms and bake for another 20 minutes.
  5. Remove mushrooms and broccoli and then broil for five minutes to achieve that crispy chicken skin. Potatoes will also have crunch factor that is highly necessary.
  6. Remove from oven. Turn off oven.**
  7. Mix quinoa with mushrooms and broccoli. Add olive oil, lemon juice, salt and pepper to taste. I added more garlic salt too, I'm not going to lie.
Serve up the chicken pieces on separate platters and divide the rest. I got greedy and took 3/4 mushroom pieces and only left one for Sean. Initially I had intended to roast more mushrooms but then kind of forgot about it. Then I started plating up Sean's meal for tonight and wouldn'tcha know it, he only gets one mushroom slice--oops! I really am a mushroom fiend.

I must admit that this dinner totally rocked my world. I haven't had a dinner this awesome in well...probably not that long ago in the grand scheme of things but after the week-long lunch and dinner chicken soup, I'm definitely glad I have enough for lunch tomorrow. This is definitely going to be the best thing about tomorrow--wahoo!

* If you're lazy like me you can go ahead and mix all your veggies together and just pick out the sweet and regular potatoes when you add them to the baking dish in the second step. This will save you some mixing time but nothing else.

** When Sean's parents went on vacation without him, his mom used to leave Post-It Notes all over the kitchen reminding him to do things. One of my favourite "to-dos" that she always left him was to turn off the stove or oven. I think I have one dating back at least five years that actually says "TURN OFF OVEN!!!" with three lines underneath each word. I thought it was hilarious that at 21, Sean needed a reminder not to burn the house down.

March 31, 2010

RECIPE: ROAST CHICKEN & VEGGIES

A lot of the time I don't post recipes on my blog because they mostly consist of crap...err, foodstuffs, I kind of just throw together. This isn't going to be an exception but I thought I'd do a full out post of what I usually make myself for lunch, considering it's almost the exact same thing I've been eating for three weeks now.

It all starts with organic chicken drumsticks. It's not really my chicken part of choice but buying and cutting up and then freezing and defrosting a whole chicken isn't really my thang, so I usually go with chicken drumsticks because it's usually that, or a whole chicken at the local grocery store. My thang about touching a whole raw chicken is that it reminds me of holding a baby. I mean, have you ever grabbed a chicken right under it's wings, like where you would pick up a baby from its...uhhh...armpits (I guess)? It's kind of creepy! And the raw chicken is kind of like a baby...it's the same size, weight, a little smooth and wet and stuff. It totally grosses me out. The first time I ever held a chicken like that it totally reminded me of holding a baby and then I couldn't deal with the chicken any longer.

Anyhoo, for today's menu (which ended up being lunch for three consecutive days), I made roast drumsticks and veggies. My choice of veggies are usually the same with some mix-ins, depending on what's in the fridge or what I have a craving for, if I can get a hold of my dad before he's been to the grocery store. This time I had butternut squash, zucchini, mushrooms and broccoli. Normally I have sweet potatoes in place of the butternut squash but I had asked my parents to pick up the squash for me and not remembering the original reason I wanted it, I figured roasting it would be a good idea. So into the oven it went...

Dom's Usual Roast Chicken & Veggies
Ingredients:
- Mix of veggies...in this case I used one medium butternut squash, one head of broccoli, 10 or so medium mushrooms and two small zucchinis
- 3 organic chicken drumsticks
- extra virgin olive oil
- Mrs. Dash garlic and herb seasoning
- salt and pepper

Directions:
  1. Prep veggies. I peeled the butternut squash and trimmed the broccoli. Cut the squashes into medium chunks...I'd say around 1.5" square-ish. I left the mushrooms whole and cut the broccoli into large florets since they roast faster. Once prepped, dump into a large bowl.
  2. Coat veggies and chicken in olive oil. Coat well. You want everything to kind of glisten with oil--especially the broccoli so it doesn't burn and get all black and crusty.
  3. Season with Mrs. Dash, salt and pepper. My Mrs. Dash doesn't contain salt so it would be wise to add your own. Season well. Plain roasted chicken tastes bland and boring. No one wants boring chicken. Boring chicken, boring life--just ask the Slap Chop guy.
  4. Dump everything into an oven-proof baking pan lined with foil. Lining things with foil makes for easy clean-up and doesn't ruin your baking pan. I like it.
  5. This is what everything should look like before you stick it into the oven:
  6. Roast at 350F for 35 minutes, then broil for 4.5 minutes so that the chicken skin gets brown and crispy. I love crispy chicken skin and because it's organic and kind of a luxury, I eat it up when I get the chance. You can discard it if you want.
So when you're done, everything should look similar to this:Note that this photo was taken the next morning so my chicken doesn't look as appetizing as it would if it were taken straight out of the oven. I usually portion out my meals with the chicken first (one drumstick per meal, usually lunch) and then divvy up the veggies.

For about 15 minutes of prep and 35 minutes of roasting time (in which you don't have to really do anything), you have enough food for three meals (or more if you're a light-eater, which clearly I am not when it comes to work lunches).

It's also a really great way to get in a bunch of veggies and who doesn't love roasted veggies--don't answer that! The butternut squash was a really nice change this time around. It was super sweet. Next time I think I'll make mashed butternut squash instead of potatoes when the craving hits me.

February 4, 2010

ALMOST THE WEEKEND--WAHOO!

I cannot WAIT for the weekend to begin. I know, I know...I've still got one more day of work to get through but I'm already excited. I'm been looking forward to this week for what seems like ages. Sean has the weekend off and we actually have exciting plans that involve other people! Tomorrow night we're having dinner with some high school/old co-workers and on Saturday we're hanging out with each other (Sean's parents are in Vegas for the weekend). On Sunday Jessie's having us over for the SuperBowl so we're going to eat and watch football--or at least a bit of it. I'm not a football fan by any means but I'll take any excuse to get together and eat! So far I've got organic tortilla chips and salsa on the brain. I was going to make fruits in white tea jelly for dessert but figure something more comforting and winter-like would be better. Maybe apple crumble? Or fancy cupcakes? I don't know! But either way, I'm hella excited for the weekend!

===

Today was a weird day at work. Everything kind of went wrong. First off, I made a bunch of really stupid mistakes (like writing down the wrong courier company when I had attached the courier waybill)! Then I forgot my oatmeal for second breakfast, forgot the salad dressing for my lunch and forgot my water bottle. It's a miracle I remember anything sometimes, geez! What the heck is going to happen to me 20 years from now?? I'm already scared!

For breakfast this morning I had a PB&J sandwich on 12 grain bread and then had fruit for second breakfast. Three and a half hours later though, I felt a migraine coming on and knew that half of the lunch I had packed wouldn't suffice, so I called my dad and pretty much begged him to bring me some pizza. Sad, I know! This is the only problem with my current workplace--there is nowhere nearby to eat! You pretty much have to drive somewhere or order in, and I didn't have enough time for that.

So instead of eating this:Romaine lettuce with radishes, mini carrots and strawberries; two multigrain-encrusted organic chicken fingers and a bunch of flax-encrusted sweet potato balls, I had a slice of Hawaiian pizza from Pizza Pizza.

Then I got home from work and wanted more pizza! My dad was kind enough to pick up some whole wheat pitas on the way home from picking up my brother from the bus stop and I made two different kinds of pita pizzas:
Left: pear with feta
Right: Mushrooms, zucchini, tomato and feta


While I always love the sweet and savory combo, the tri-veggie combo won this time around. I don't usually post recipes on here, mainly because Sean's the only one who reads this thing but just in case there's another one of you out there, here's some easy instructions on how to make your own pita pizzas:

Wicked Easy Pear & Feta Pita Pizzas:
- whole wheat pita (I usually get the really thin one, I can't think of the brand right now but my dad buys it from an Indian grocery store)
- 1/2 ripe pear (Barlett or Anjou work best)
- approx. 1 tsp. feta cheese (I used goat's milk feta)
  1. Toast your pita bread. This step is super easy if you have a toaster oven. If you don't own, you really should. I cannot stop singing the praises of my toaster oven. I think Sean's tired of hearing me talk about my toaster oven. Anyway, if you don't have one you'll probably need to bake your pita at 350F for five minutes or so. I honestly have no clue since I always use the toaster oven.
  2. While the pita bread cools down, remove stem and core from the pear. (I keep the skin on but if you prefer, you can peel it.) Thinly slice the pear...thumbs up if you have a mandolin slicer.
  3. When pita bread is cool enough to handle, arrange the pear slices on the pita bread and then crumble the feta over the pita.
  4. Place pita bread back into toaster oven and broil for five minutes. Again, if you don't have a toaster oven you'll have to use the oven and watch the pita carefully.
  5. Remove from oven when edges of pear are slightly "crimped" and feta begins to "set" or melt a little, just a teeny little bit.
  6. Enjoy!
I love this recipe because it takes no time at all. I made three pita pizzas by prepping by topping while they each took their turn in the toaster oven. Then I arranged all the toppings and then broiled them for five minutes. The one with the veggies took a little bit longer because the tomato was raw and I wanted it to be a little bit more cooked through. I even did a sink full of dishes while I waited for my pizzas to broil. Super quick and easy and you can customize your pizza any way you want. Another one of my fave toppings is black olives, mushrooms and feta cheese. Mmmm.

And that's all for today. It's another short entry. I have to pack my stuff for the weekend.